So, you’ve decided to bid farewell to your trusty awnings. Maybe they’ve weathered one too many storms, or you’re looking to change up your home’s exterior. Whatever the reason, the key is to do it safely. In this comprehensive guide, we’ll walk you through taking down awnings on your home step by step. From gathering the necessary tools to ensuring your safety and the longevity of your awnings, we’ve got you covered. So, without further ado, let’s dive into the world of awning removal.
Prepare the Essential Tools and Materials
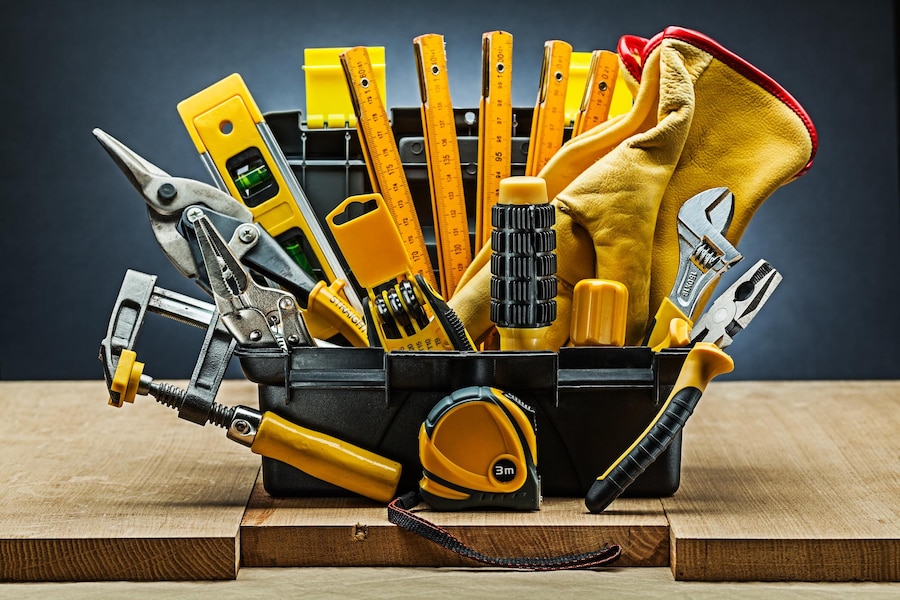
Before we start, ensure you have all the tools and materials needed for this task. It’s always best to be prepared.
Tools:
- Ladder
- Screwdriver
- Wrench
- Utility Knife
- Pliers
- Safety Gear
- Drill
- Measuring Tape
- Bucket and Sponge
- Duct Tape
Materials:
- Trash Bags
- Sealant
- Replacement Parts
- Paint and Brushes
- Safety Harness
Assessing Your Awnings
What Type of Awnings Do You Have?
First and foremost, identify the type of awnings in your home. Is it a retractable awning, a stationary one, or a canopy? Each may require slightly different removal methods, so knowing what you’re dealing with is crucial.
Retractable Awnings
Retractable awnings are known for their flexibility but come with challenges during removal. Here’s how to tackle them:
- Start by fully retracting the awning, ensuring it’s closed.
- Locate the mounting brackets and carefully remove any screws or bolts securing them to the wall.
- Once the brackets are detached, gently lower the awning frame to the ground with the help of a partner.
- Pay attention to the awning’s folding arms, ensuring they fold neatly to avoid damage.
- Store the retracted awning in a cool, dry place to prevent mildew or moisture damage.
Stationary Awnings
Stationary awnings, while robust, require a slightly different approach:
- Begin by identifying the anchor points where the awning is secured to the wall or structure.
- Use your tools to carefully remove any fasteners, such as screws or bolts, securing the awning.
- Have a partner assist you in supporting the awning’s weight as it is detached.
- Stationary awnings may be heavy, so ensure you have proper support during removal.
- Store the stationary awning where it won’t be exposed to the elements, preserving its condition for future use.
Canopy Awnings
Canopy awnings often have a unique frame design, and their removal requires attention to detail:
- Start by identifying the points where the canopy is attached to the frame.
- Carefully detach any fabric or covering from the frame.
- Once the fabric is removed, disassemble the frame systematically, paying attention to any connectors or joints.
- Canopy frames may be intricate, so take your time to avoid damaging any components.
- Store the frame and fabric separately in a dry area to prevent moisture-related issues.
Checking for Damage
Inspect your awnings for visible damage, such as tears, rust, or bent frames. Replace them if they’re in poor condition. In contrast, if they’re still in good shape, you can proceed with removal.
Safety Precautions
How to Safely Take Down Awnings on a Home?
Safety should be your top priority throughout this process. Here’s how to ensure it: Always work with a partner. Two sets of hands are better than one, especially when dealing with large awnings. Wear the appropriate safety gear, including gloves, safety glasses, and a helmet. Even if you’re not working at great heights, accidents can happen. Position your ladder on stable ground and have someone hold it steady while climbing. Don’t rush. Take your time to avoid accidents.
Step-by-Step Removal
Now that we’ve laid the groundwork let’s dive into the nitty-gritty of removing those awnings.
Step 1: Disconnect Electrical Components
If your awning has electrical components, such as a motor for retractable awnings, the first crucial step is to ensure your safety by disconnecting the power source. This step is paramount, eliminating any risk of electrical accidents during removal. Depending on your awning setup, locate the power supply, switch it off, or unplug it. Safety always comes first when working with electricity.
Step 2: Remove Fabric or Canopy
With the electrical components safely disconnected, it’s time to move on to the physical removal of the awning. Begin by carefully detaching the fabric or canopy from the frame. This step may require a ladder and an extra pair of hands. Gently peel the fabric away from the frame, ensuring you don’t tear or damage it. If your awning is particularly large or heavy, having a helper is especially important to prevent accidents.
Step 3: Unscrew or Unbolt
Now that the fabric is removed, you can focus on the frame. Use your screwdriver or wrench to remove the screws or bolts that secure the frame to your home’s exterior. These fasteners are typically found at various points along the frame, firmly attached to the wall. Carefully and systematically remove each screw or bolt during this step. Keeping these fasteners in a safe place is essential, as you may need them for reinstallation if you decide to back up the awnings.
Step 4: Gradual Dismantling
As you work your way through unscrewing or unbolting the frame, it’s important to maintain stability and control. Have your partner support the frame as you remove the fasteners. This cooperation prevents any sudden drops or damage to your property. The gradual dismantling of the frame ensures that you have a firm grip on the situation and minimizes the risk of accidents or damage to the awnings.
Step 5: Clean and Patch
With the awnings safely down, it’s time to address any mess or damage that may have occurred during the removal process. Clean up any leftover debris, ensuring your work area is tidy and safe. Remove any loose screws, nails, or other materials that might pose a hazard.
Next, inspect your home’s exterior for any holes or marks left by the awning’s frame. These can be unsightly and may lead to water damage if left unaddressed. To remedy this, use your sealant to patch any holes or marks on your home’s exterior. Apply the sealant evenly and allow it to dry thoroughly before moving on to the next steps. This ensures that your home remains in good condition after awning removal.
Step 6: Store or Replace
Finally, you have two options regarding the awnings: store them for future use or replace them entirely. If you store them, preparing them properly is crucial to prolong their lifespan. Ensure the awnings are clean, dry, and free from any moisture that could lead to mold or mildew growth. Proper storage will help keep your awnings in excellent condition for potential reinstallation.
Alternatively, if you’ve decided to replace your awnings with new ones or opt for a different style, you bid farewell to your old ones at this stage. Decide for their disposal according to your local waste disposal guidelines, as they may contain materials that must be handled appropriately.
Conclusion
Removing awnings from your home may seem daunting, but it can be a manageable DIY project with the right tools, safety precautions, and a step-by-step plan. Always prioritize safety; if unsure, don’t hesitate to seek professional assistance. With this guide, you’re well-equipped to safely take down awnings on your home and give your exterior a fresh look or prepare for a well-deserved replacement. Happy home improvement!